There are no items in your cart
Add More
Add More
| Item Details | Price | ||
|---|---|---|---|
In this guide, you will learn how to track Custom Conversions and Purchases.
Before proceeding to this guide, ensure that you have created different predefined events using Events Manager.
If you haven't created predefined events yet, you can follow this guide.
To start creating Custom Conversions on the Pixel, we need to follow the given path from the home of the Meta Business Manager.
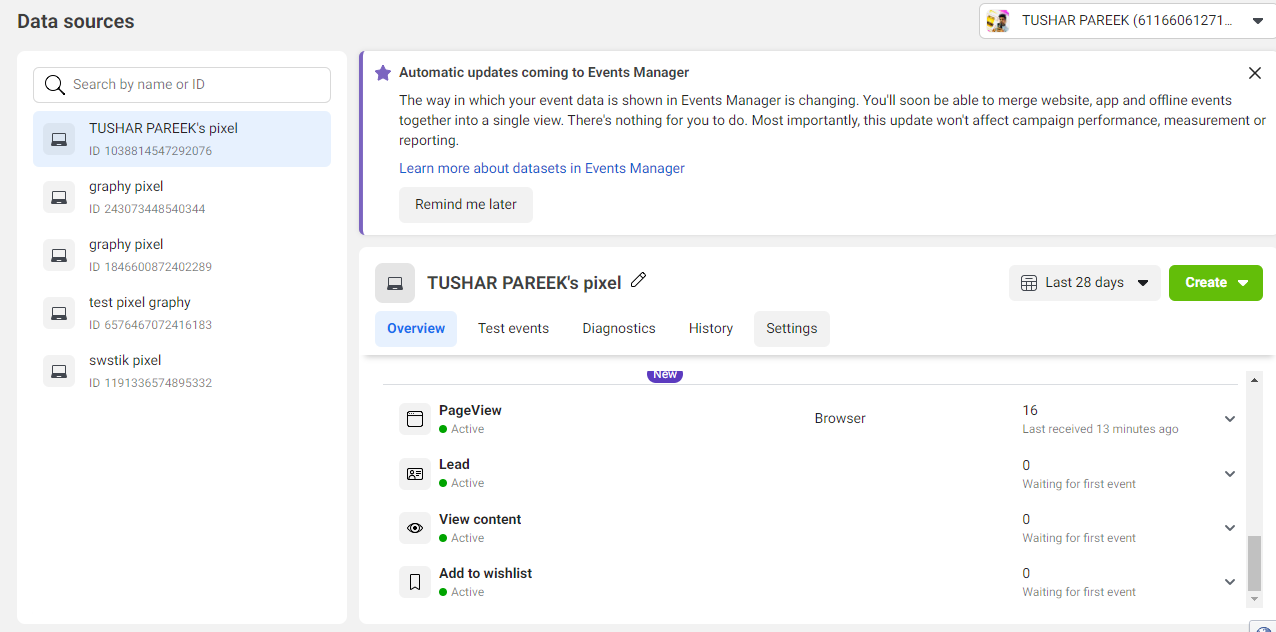
Settings > Data Sources > Pixels > Open in Events Manager
Upon following the given path, you will be redirected to this page.
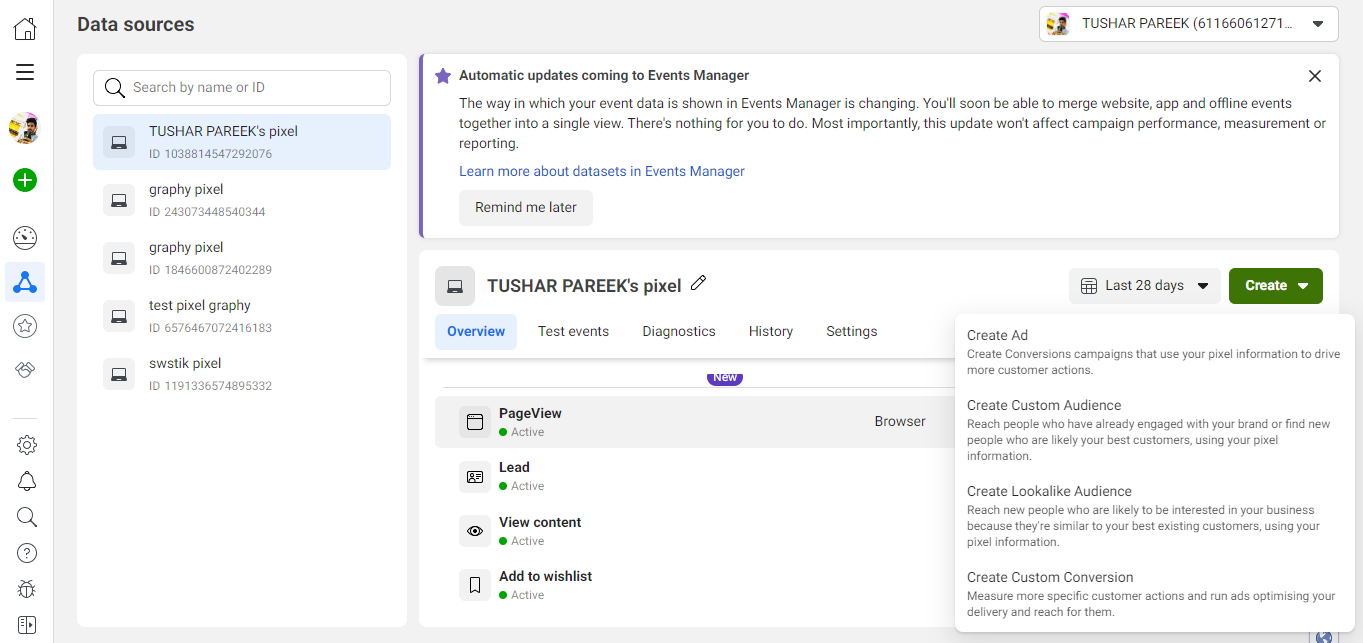
After reaching this page, we need to click on the “Create” button and from the drop down below, we need to choose the “Create custom conversion” button.
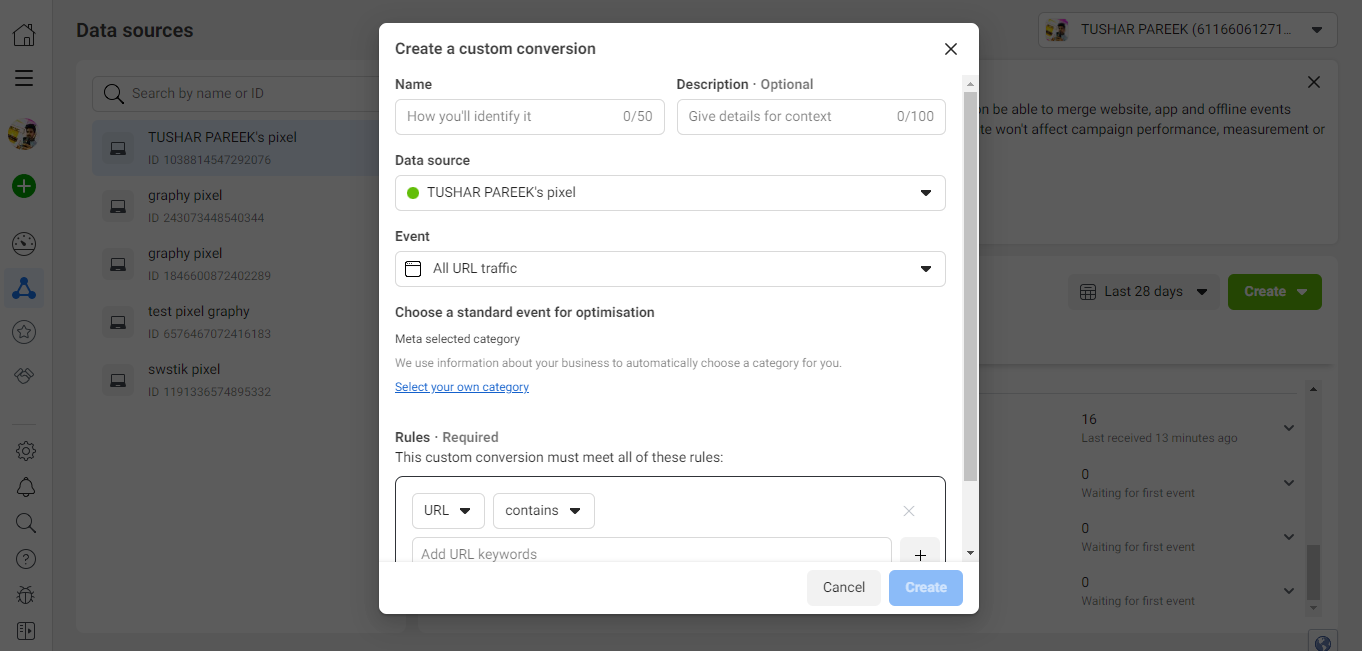
Upon clicking on the “Creating custom conversion” button, we are redirected to this pop-up page, we need to assign a rule for each conversion to be defined.
We can create different custom events on triggering of different URLs, we can even create an event if our URL contains some specific keywords.
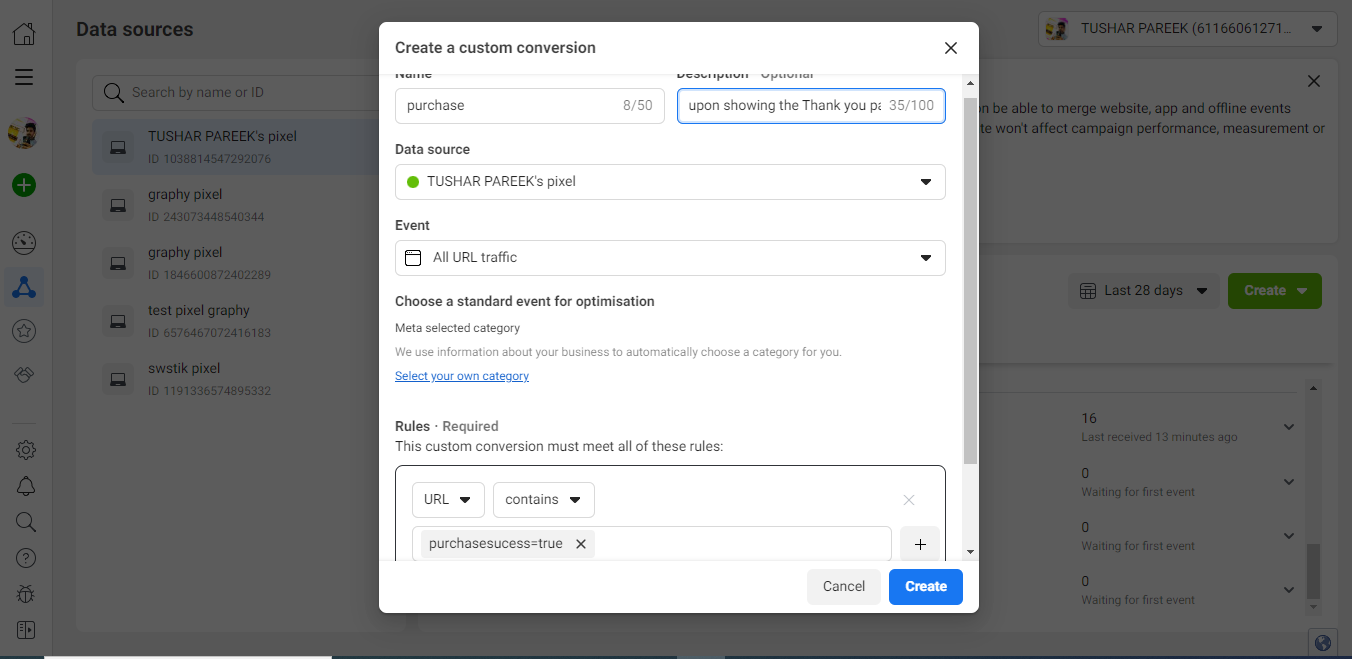
To track the Purchases event, we basically need to track the URL of the landing page, but as we know each landing page has a different URL based on different Order IDs, thus, we track the URL of landing page from this rule:
[URL Contains purchasesuccess=true]
As this element is always constant in all the landing pages URLs, thus, whenever this part of URL is triggered, it would be considered as a Purchase event.
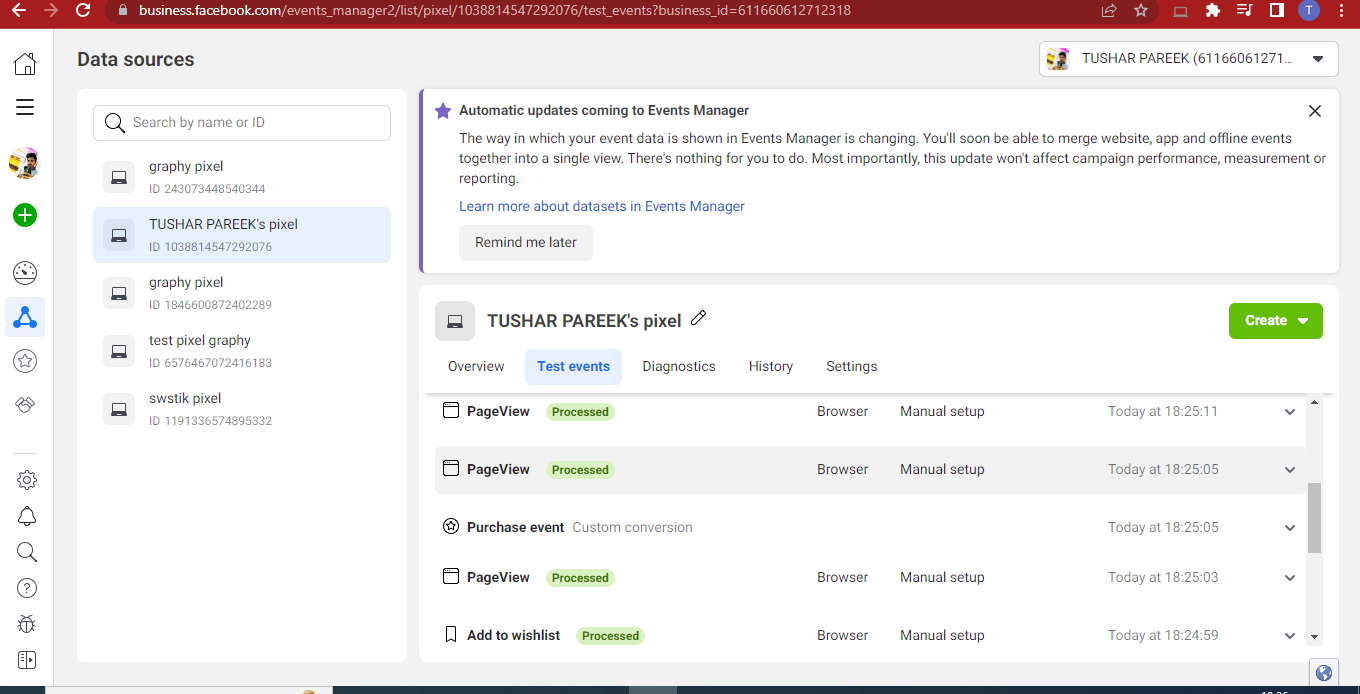
Once you have created the Custom conversion event, you can always check whether the event is correctly triggering in the Test events section of your attached Pixel.
If you have any issues in the implementation part, feel free to reach out to us.
