There are no items in your cart
Add More
Add More
| Item Details | Price | ||
|---|---|---|---|
To set up conversion tracking on a graphy website using facebook pixel, you first need to install facebook pixel code to on graphy website!
In this guide you will learn to set up conversion tracking on a graphy website using facebook pixel.
Thus to track the conversions using facebook pixel, we must be having a Meta business manager account created.
You can follow this link if you haven't created your business manager account yet!
You can follow this link to get redirected to the business manager account!
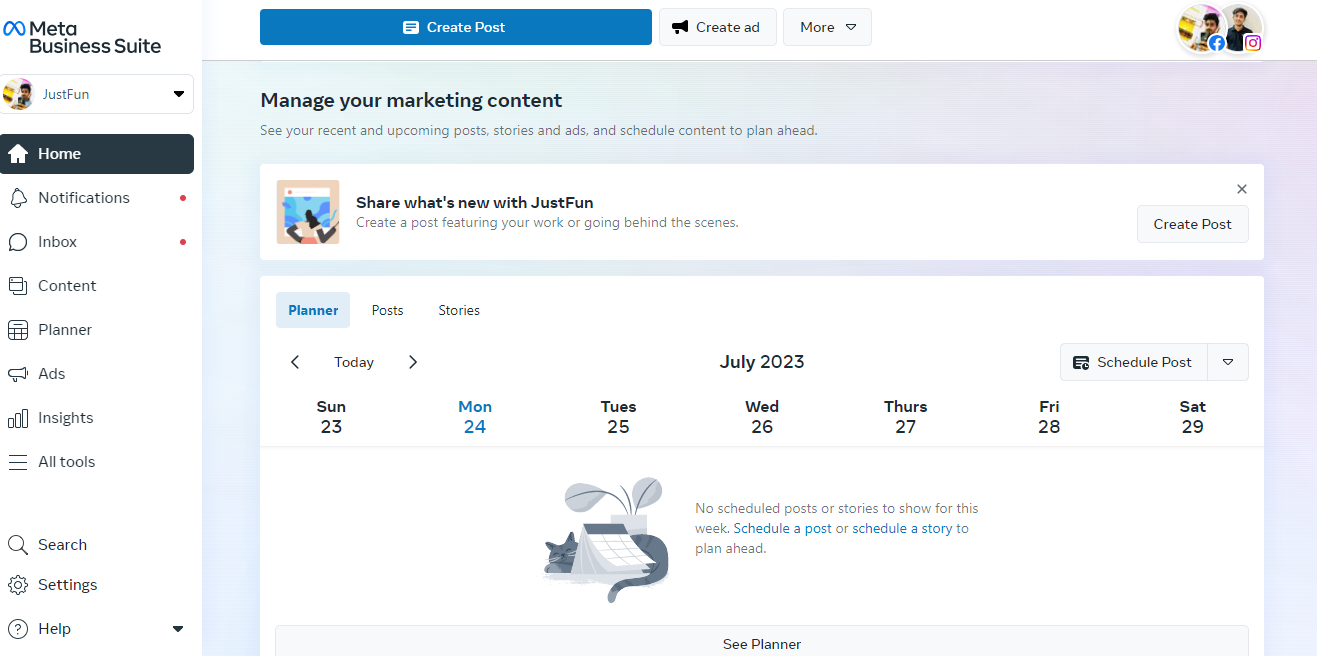
following is the interface of the meta business manager!
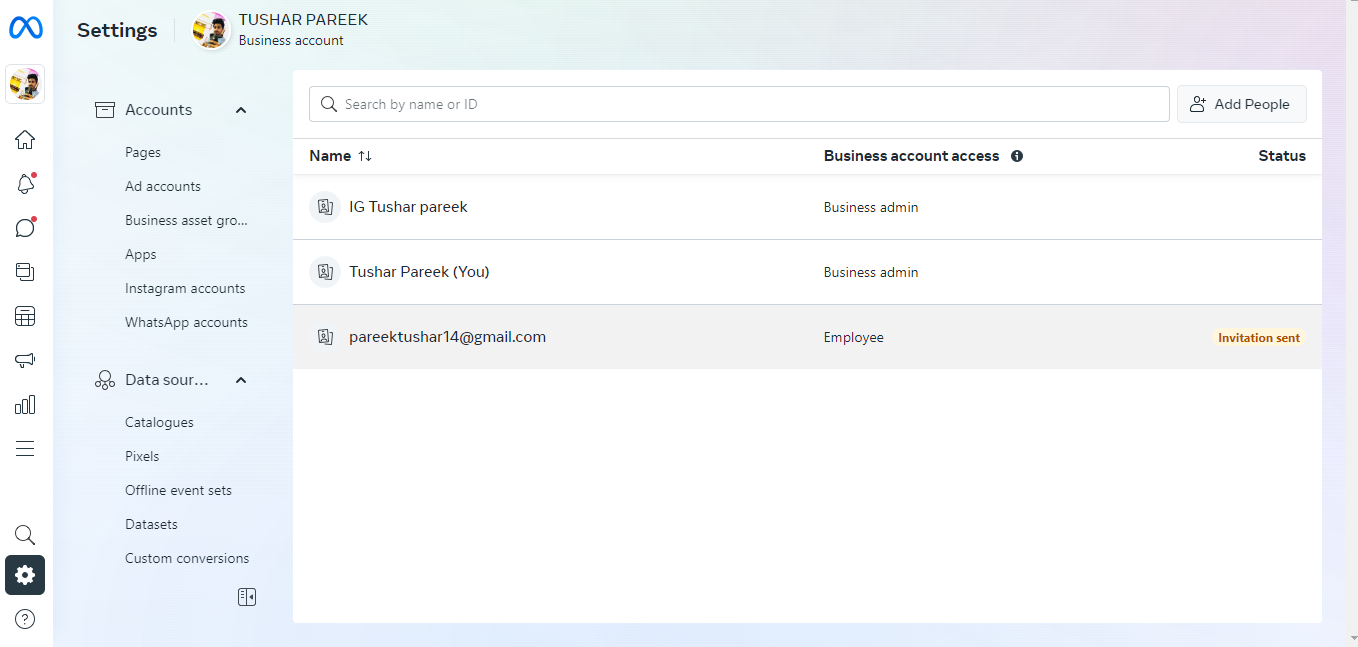
On the dashboard of the meta business manager, you need to visit the “settings” in the bottom left side of the page.
In the settings section, you need to go to the given path:
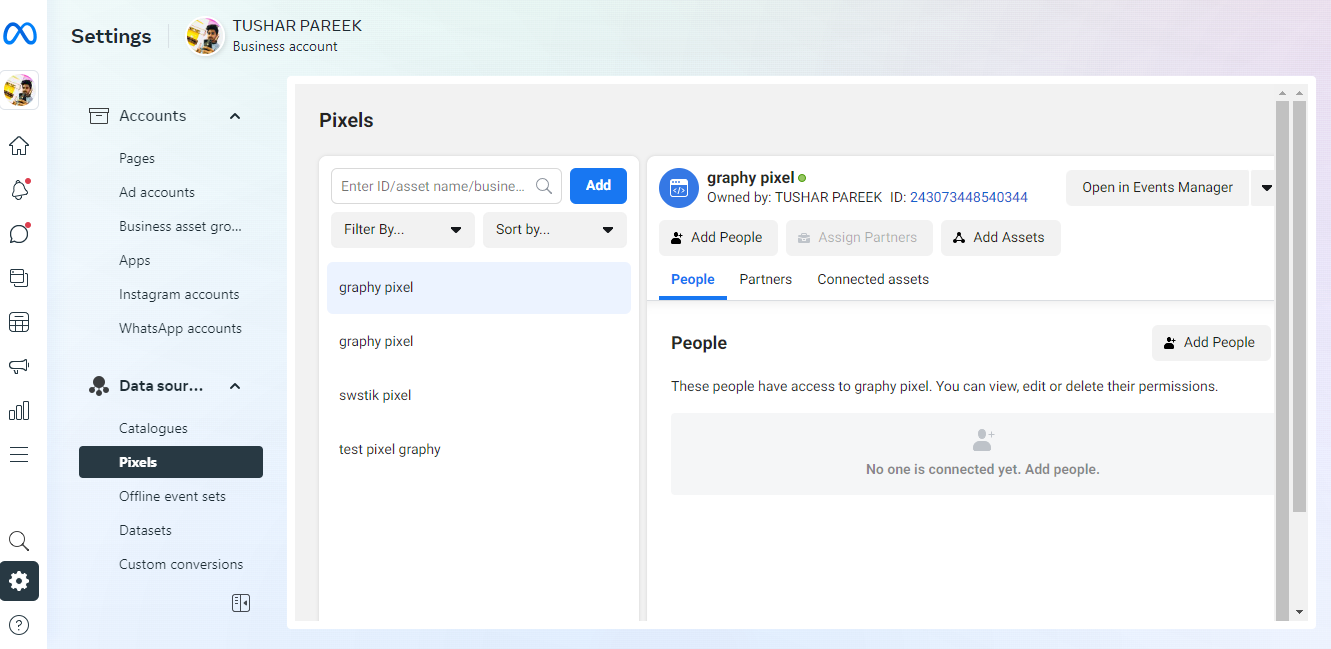
Settings > Data sources > Pixels
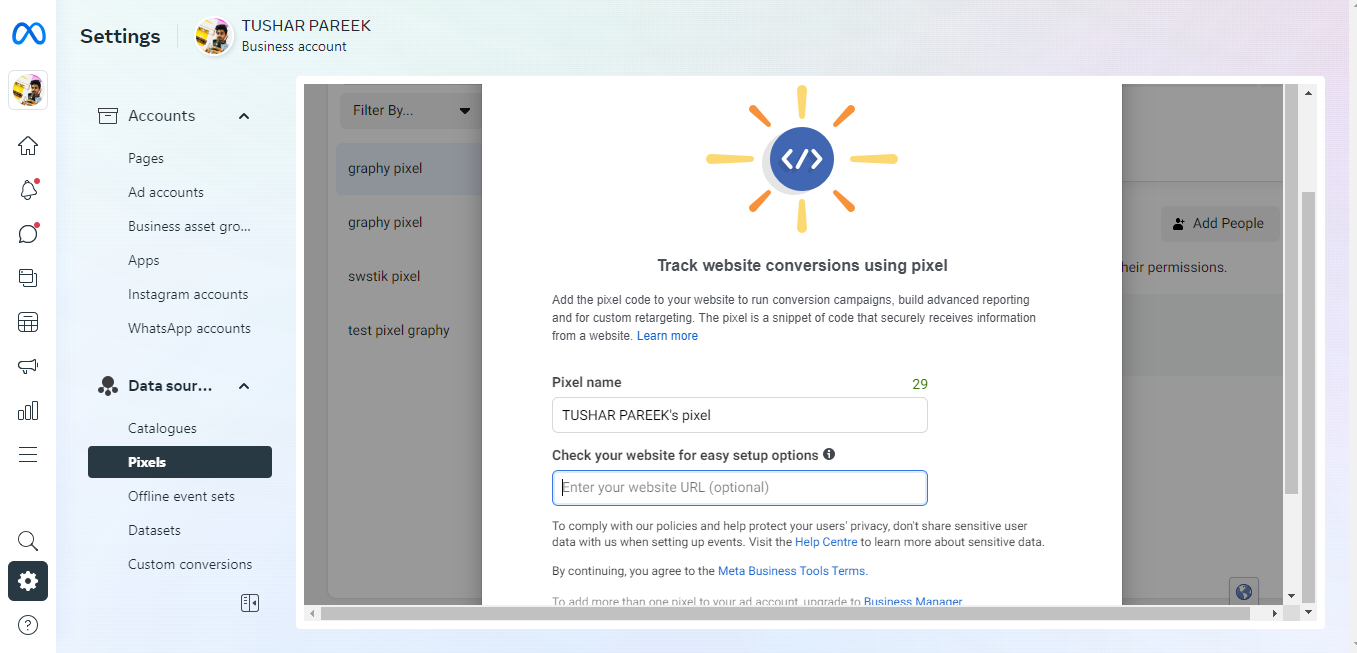
Under the pixels section, you will get an option to ‘Add’ a pixel, after clicking on the option, you can create a new pixel.
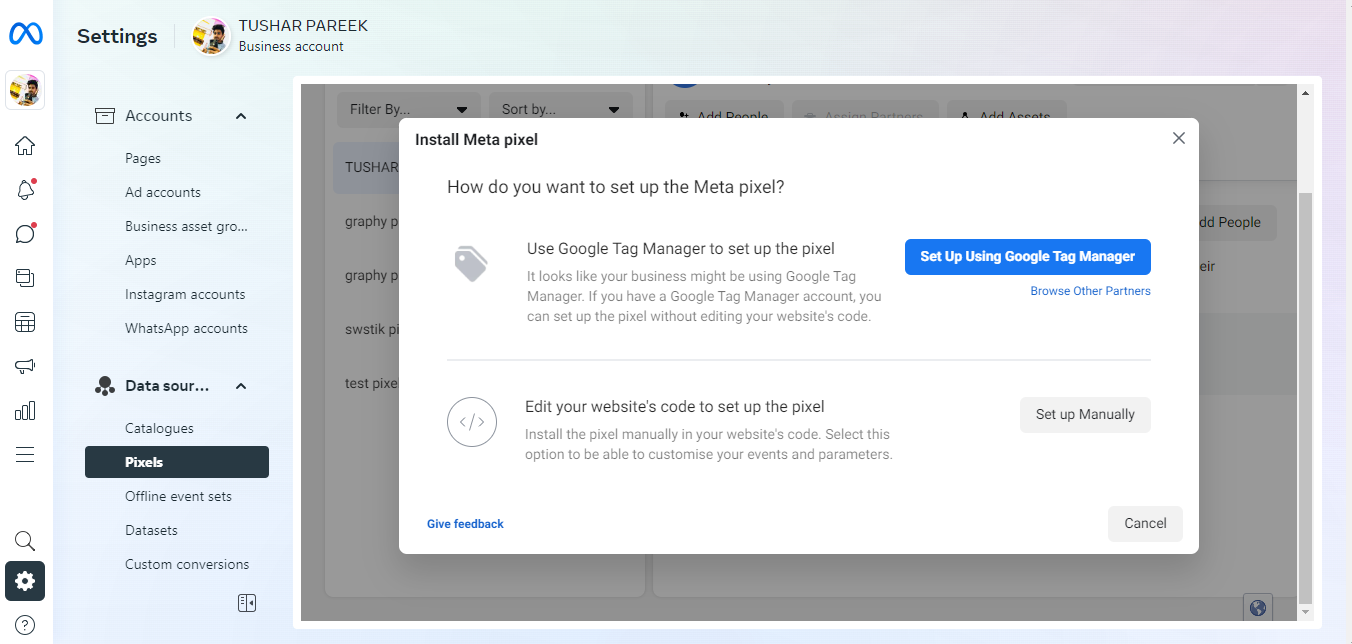
After filling the name of the pixel and website to be redirected, you will be able to get a specific pop up to either set up using “Google Tag manager” or “Manual setup”
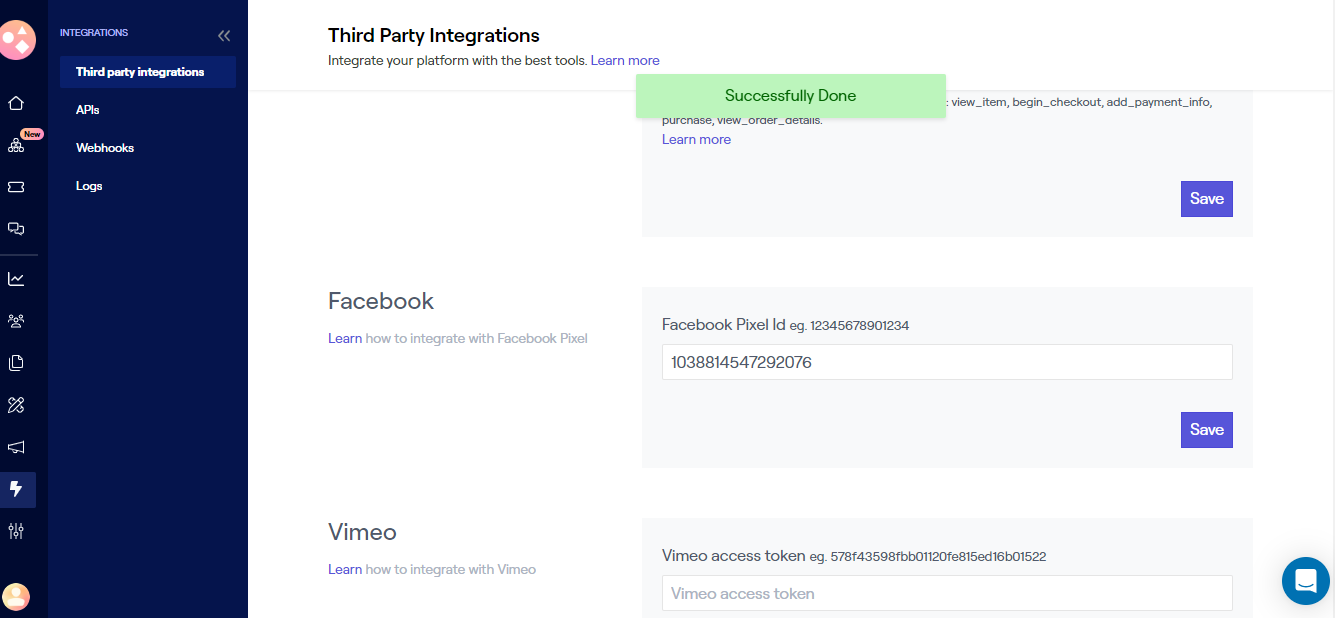
But in a graphy website, you don’t need to do any of these methods, you can simply paste the pixel id inside the third party integration section of the graphy dashboard.
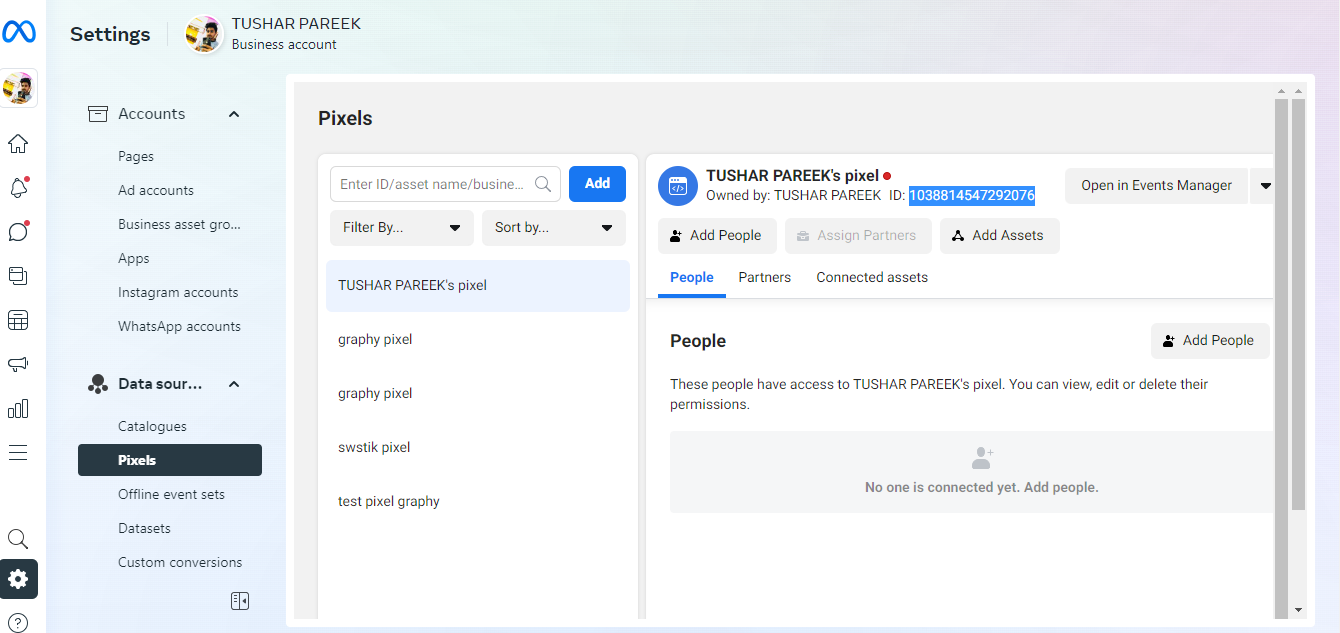
You can directly copy the pixel id from the pixels sections under data sources, Pixel id is highlighted in the image!
After copying the pixel id from here, you can directly paste the pixel id to the third party section of graphy’s dashboard.
Here you have successfully integrated facebook pixel with your graphy website, you will now check whether the pixel is providing accurate results or not.
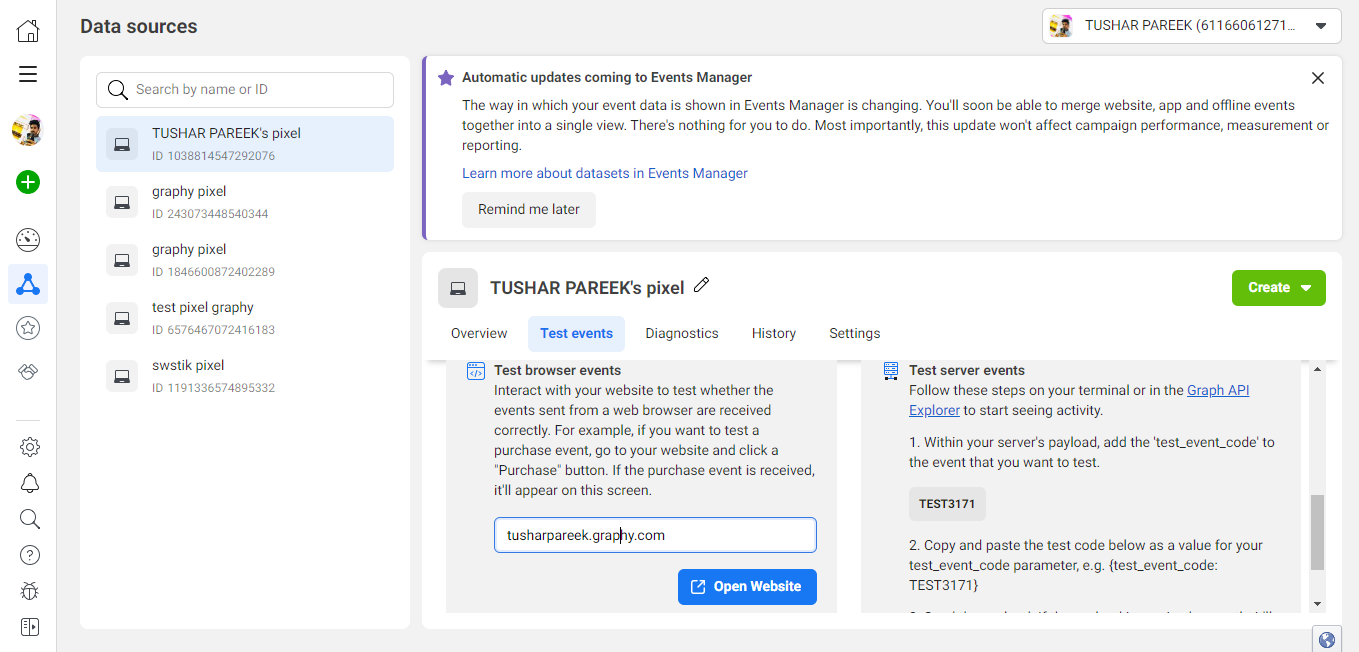
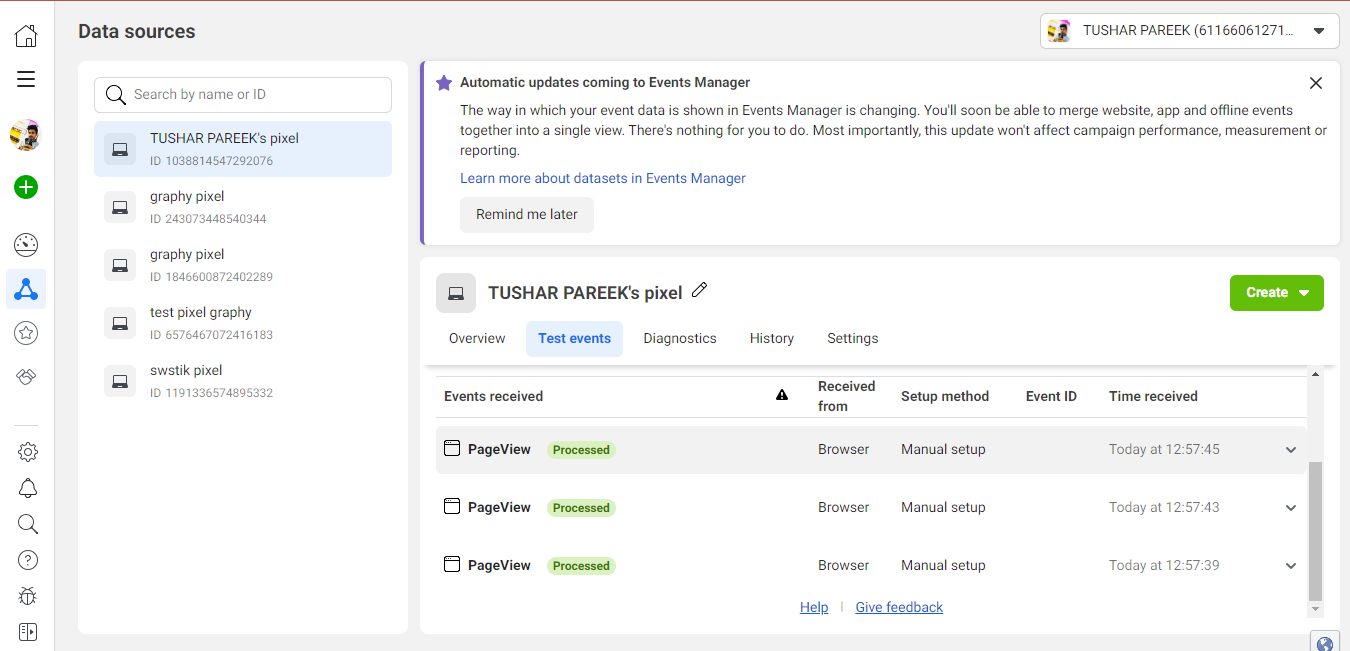
To test events on the pixel you will follow this path:
Settings > Data sources > Pixels > Open in Events manager > Test events
In the test events section, you need to put the url of the website from which you have integrated the facebook pixel and then click on the “open website” button.
It will then redirect us to your website and it will record all the predefined events which you perform on the website and you can check that in the ‘Test events’ section.
Once you confirm that the pixel is working correctly and providing results of test events, You can then move further to create custom events and track different buttons and website urls.
If you have an issue in the implementation part, Feel free to reach out to us!
