There are no items in your cart
Add More
Add More
| Item Details | Price | ||
|---|---|---|---|
In this guide, you will learn to connect your Google Analytics account to your Graphy website using Google Tag Manager.
For connecting the Google Analytics, first thing is to create an account on Google Analytics.
To create an account on Google Analytics, you can follow this link.
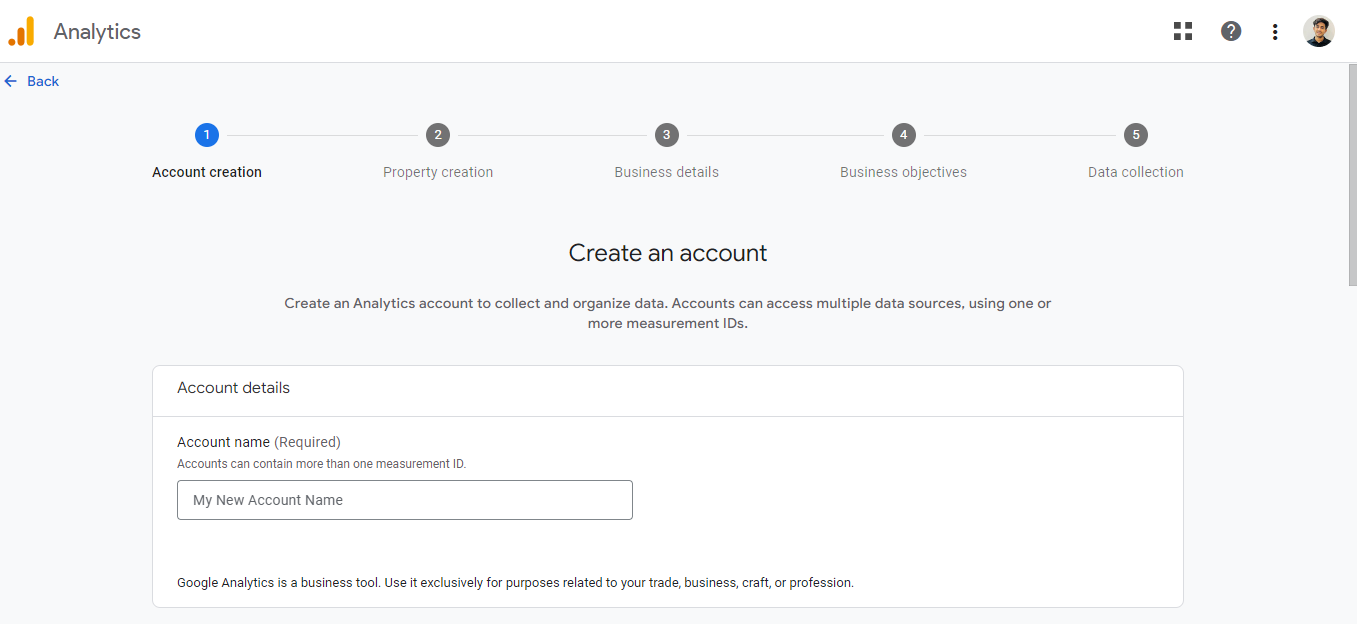
Once you click on this link, you’ll be redirected to the following page.
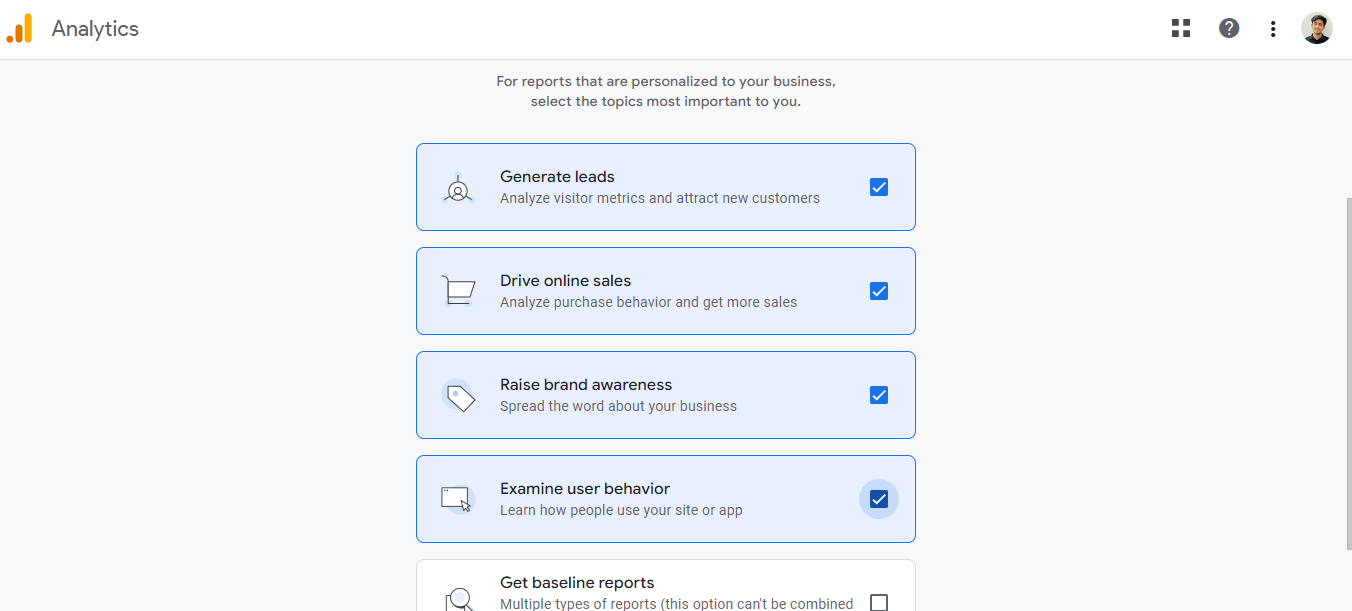
Here, you have to provide your business and other relevant information, so a customized dashboard is set on Google Analytics.
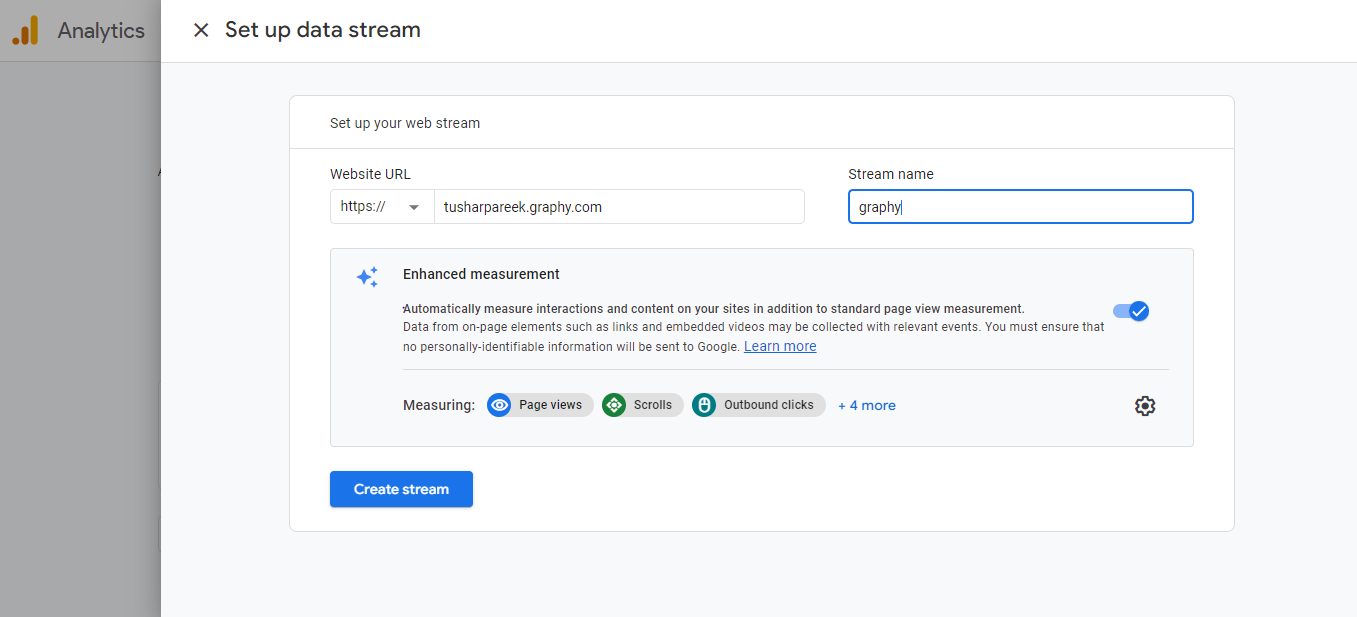
Once you fill out all the information, in the final step you need to create a data stream, where you need to provide your website’s URL as well provide a name for the stream.
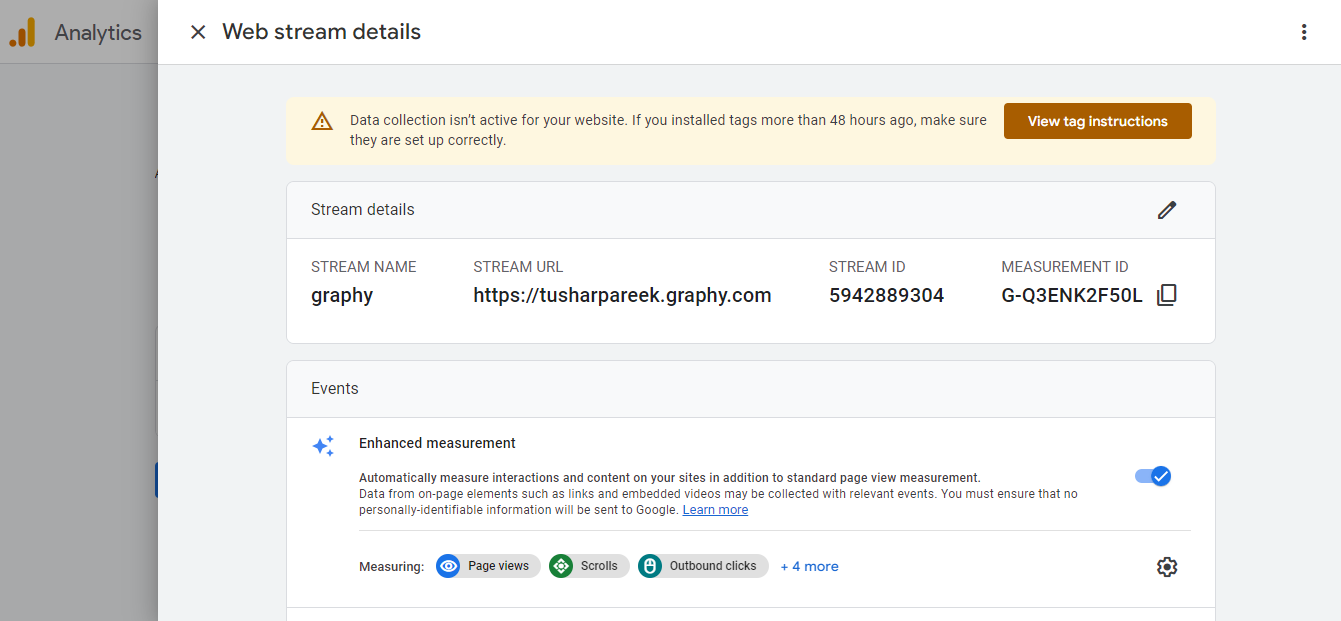
Now, click on the “Create stream” button after filling the data for the web stream, and you will be redirected to the following page, where you will get the value of Measurement ID and Stream ID.
Measurement ID is helpful for us in integrating Google Analytics with Google Tag Manager, hence, you should copy the Measurement ID and maintain it on your end for future reference.
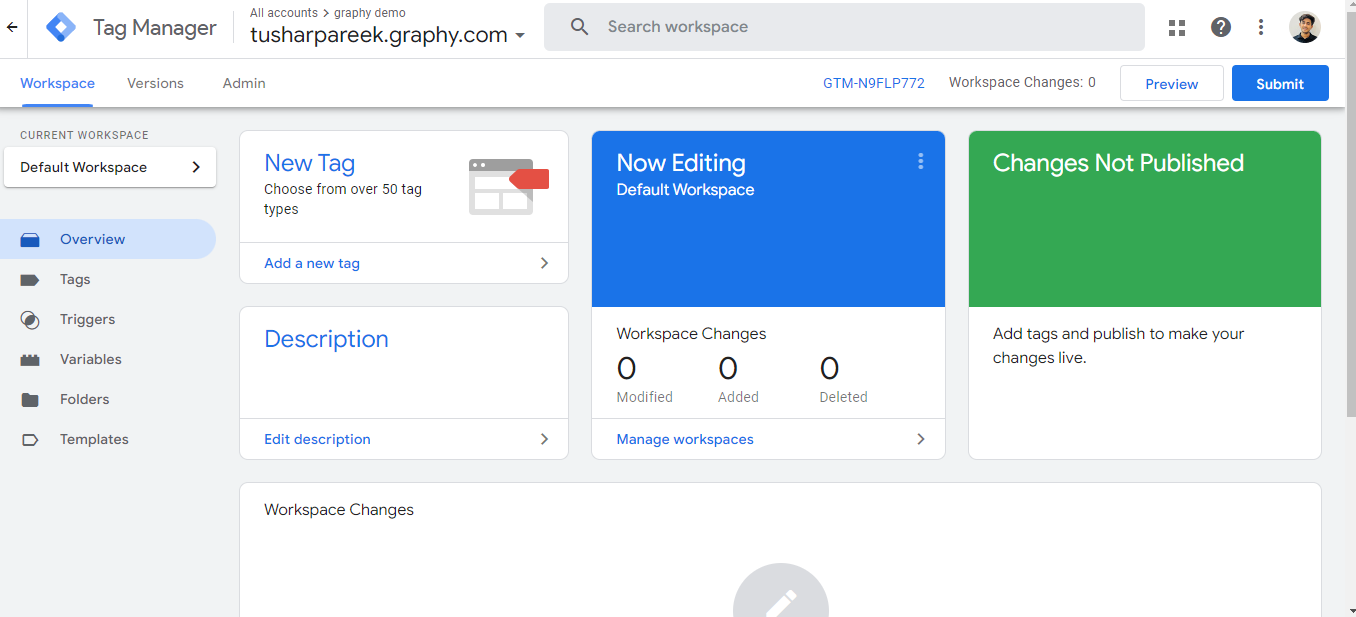
Once you have Measurement ID with you, you need to again visit the homepage of Google Tag Manager by clicking on this link.
Once you click on the link, you will be redirected to following page:
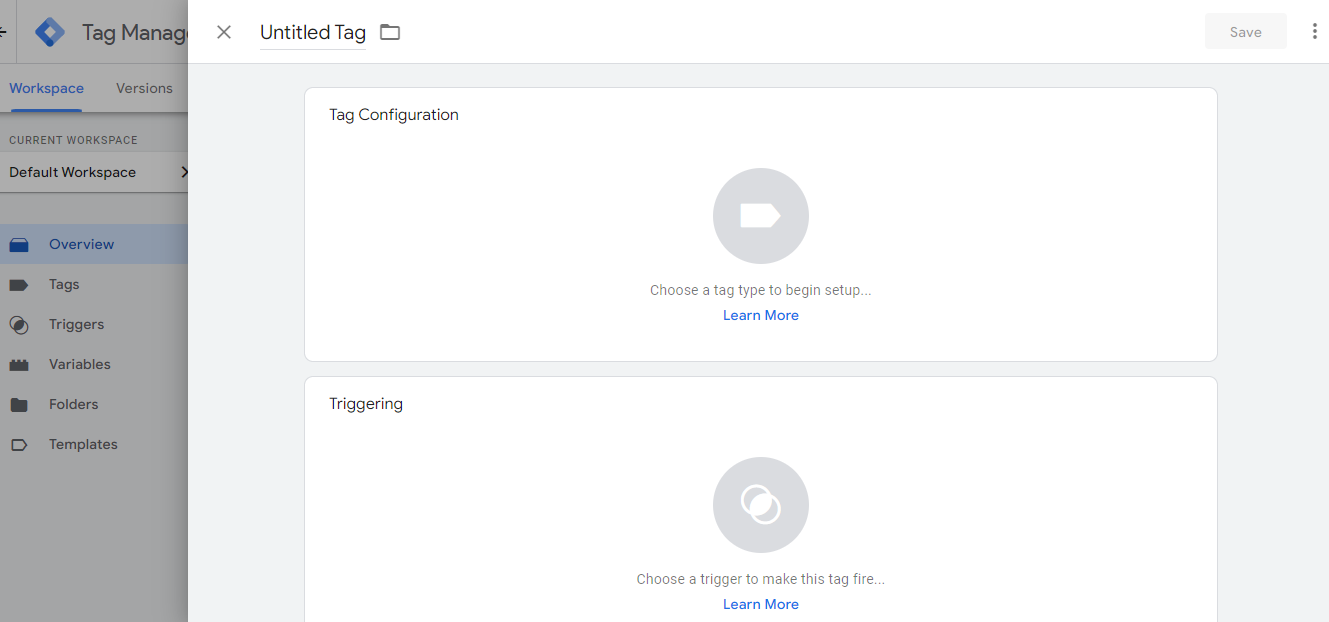
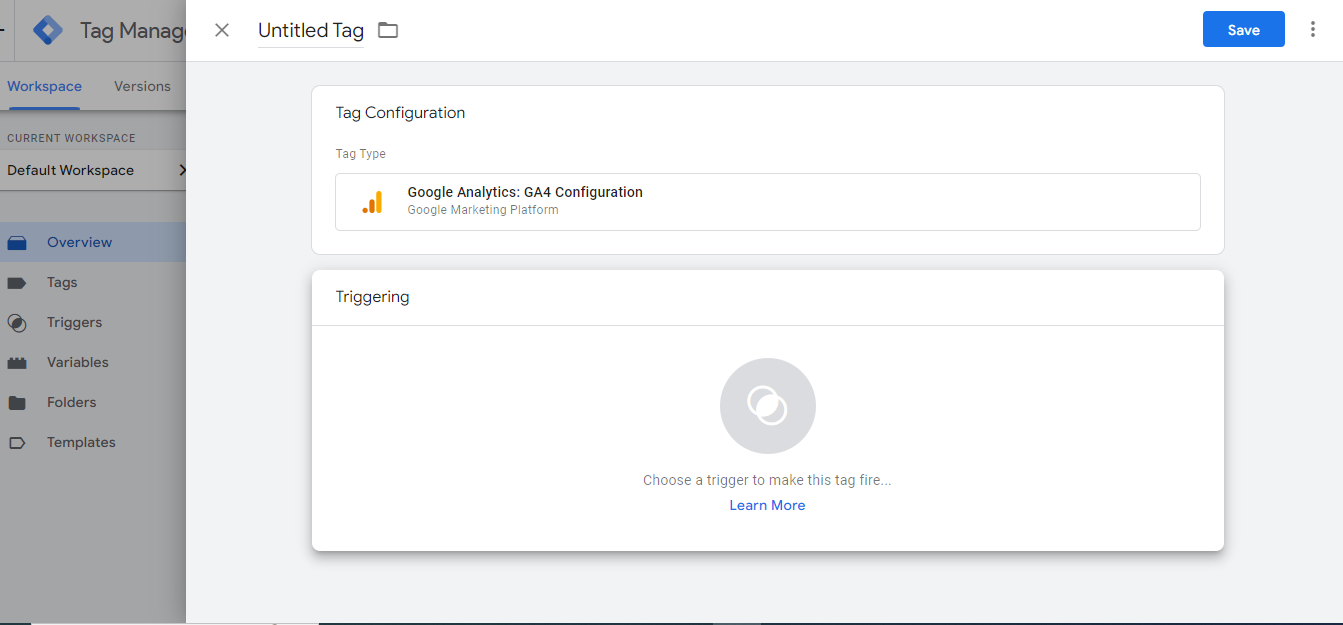
Here, you need to click on the “New tag” option, and you will be redirected to following pop-up:
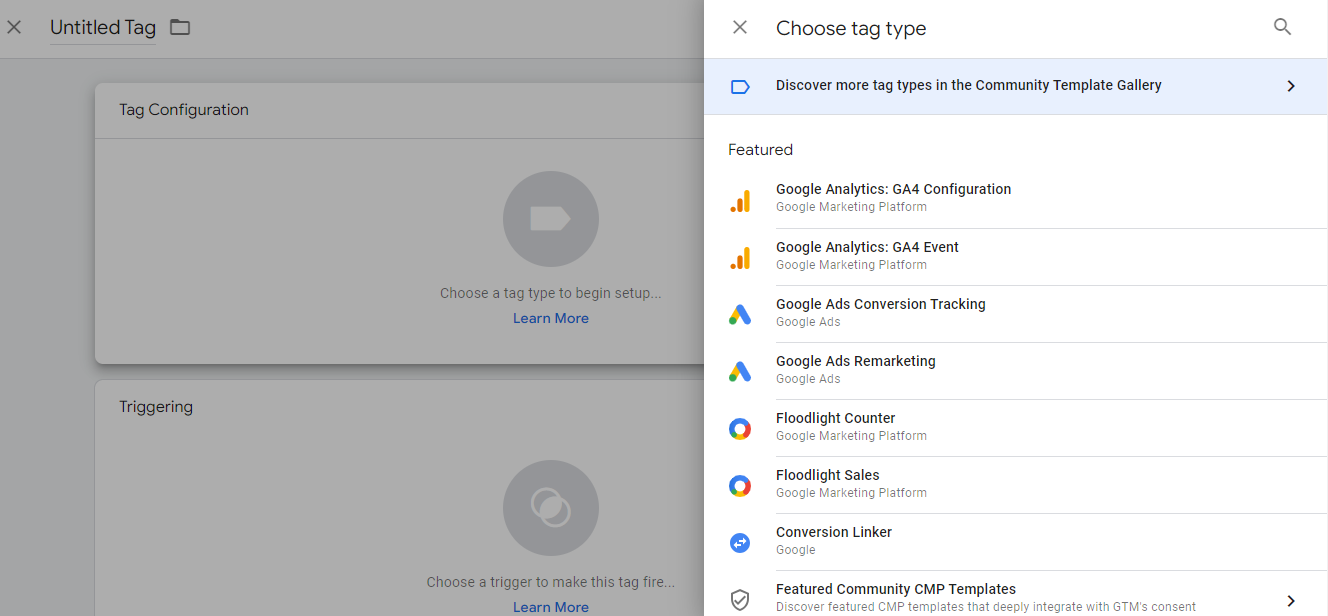
Here you need to define both Tag Configuration and Triggering, you need to first set up Tag Configuration and then go for the Trigger.
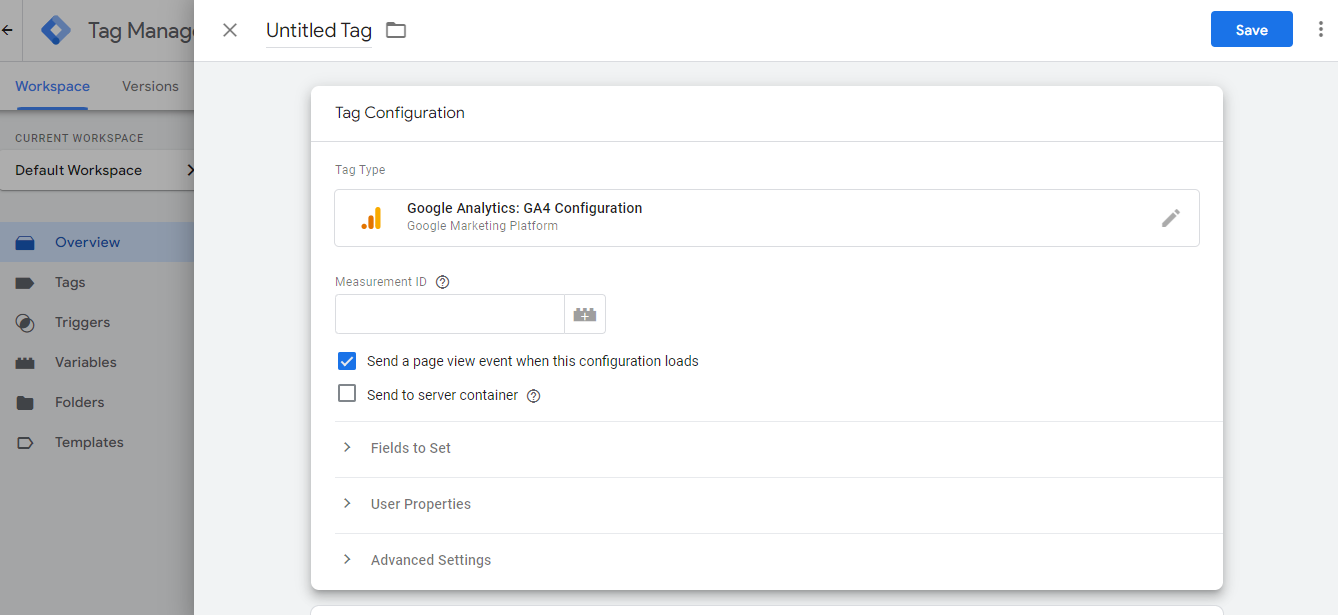
Initially, you need to choose the “Google Analytics : GA4 Configuration” tag and upon choosing this option, you will be redirected to a pop-up asking for the Measurement ID.
Thus, you will provide the Measurement ID here, which we got from the Google Analytics and then you can proceed to the Trigger part.
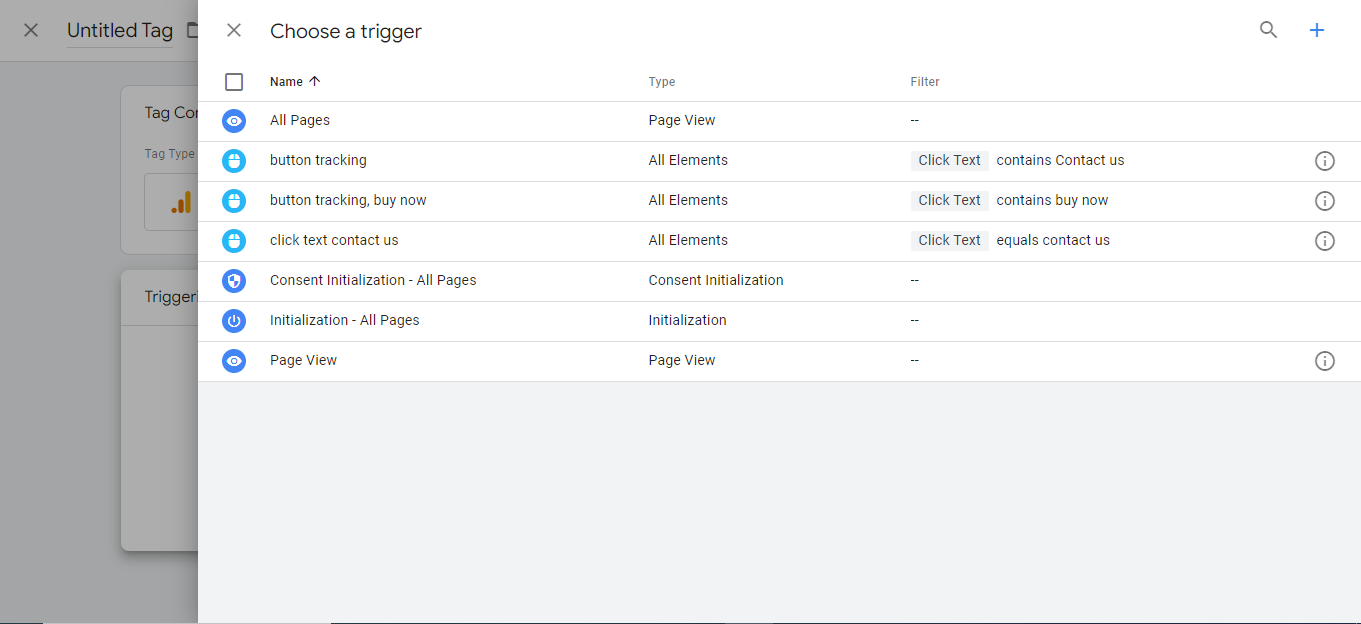
In the Trigger section, each tag needs to be defined when its need to be triggered, trigger can be chosen on the basis of different situations. Now, click on the “Create stream” button after filling the data for the web stream, and it will redirected to the following page, where you will get the value of Measurement ID and Stream ID.
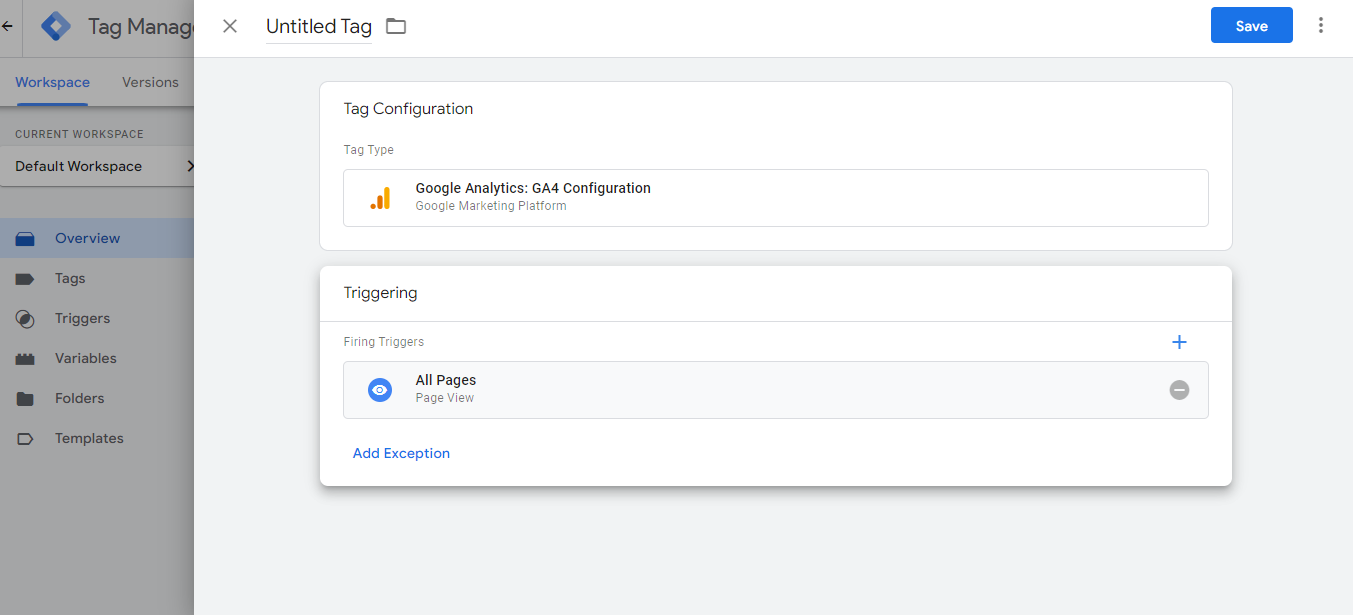
Here, you should choose the trigger on “All pages” for the Page View Type, as we’re setting up GA4 Configuration.
Once you have created the tag, kindly save the tag and the trigger at the save option in the top right corner.
After saving the tags and triggers which you have created, you need to click on the Submit button on the top right corner of the page.
After filling the proper version and description, you need to click on the Publish button and your container would be live, which will help you in tracking the website’s data on Google Analytics.
If you have an further queries in the implementation part, feel free to reach out to us.
